Backup and Restore Programs
Instructions for backing up programs stored on the KIPR controller
Method 1: USB
This is the simplest method and is the KIPR recommended way to backup and restore all of your programs.
Requirements:
- USB drive formatted with the FAT32 filesystem (what is a filesystem?).
- Bootable controller
Backup
The KIPR controller has a button to back up programs onto a USB.
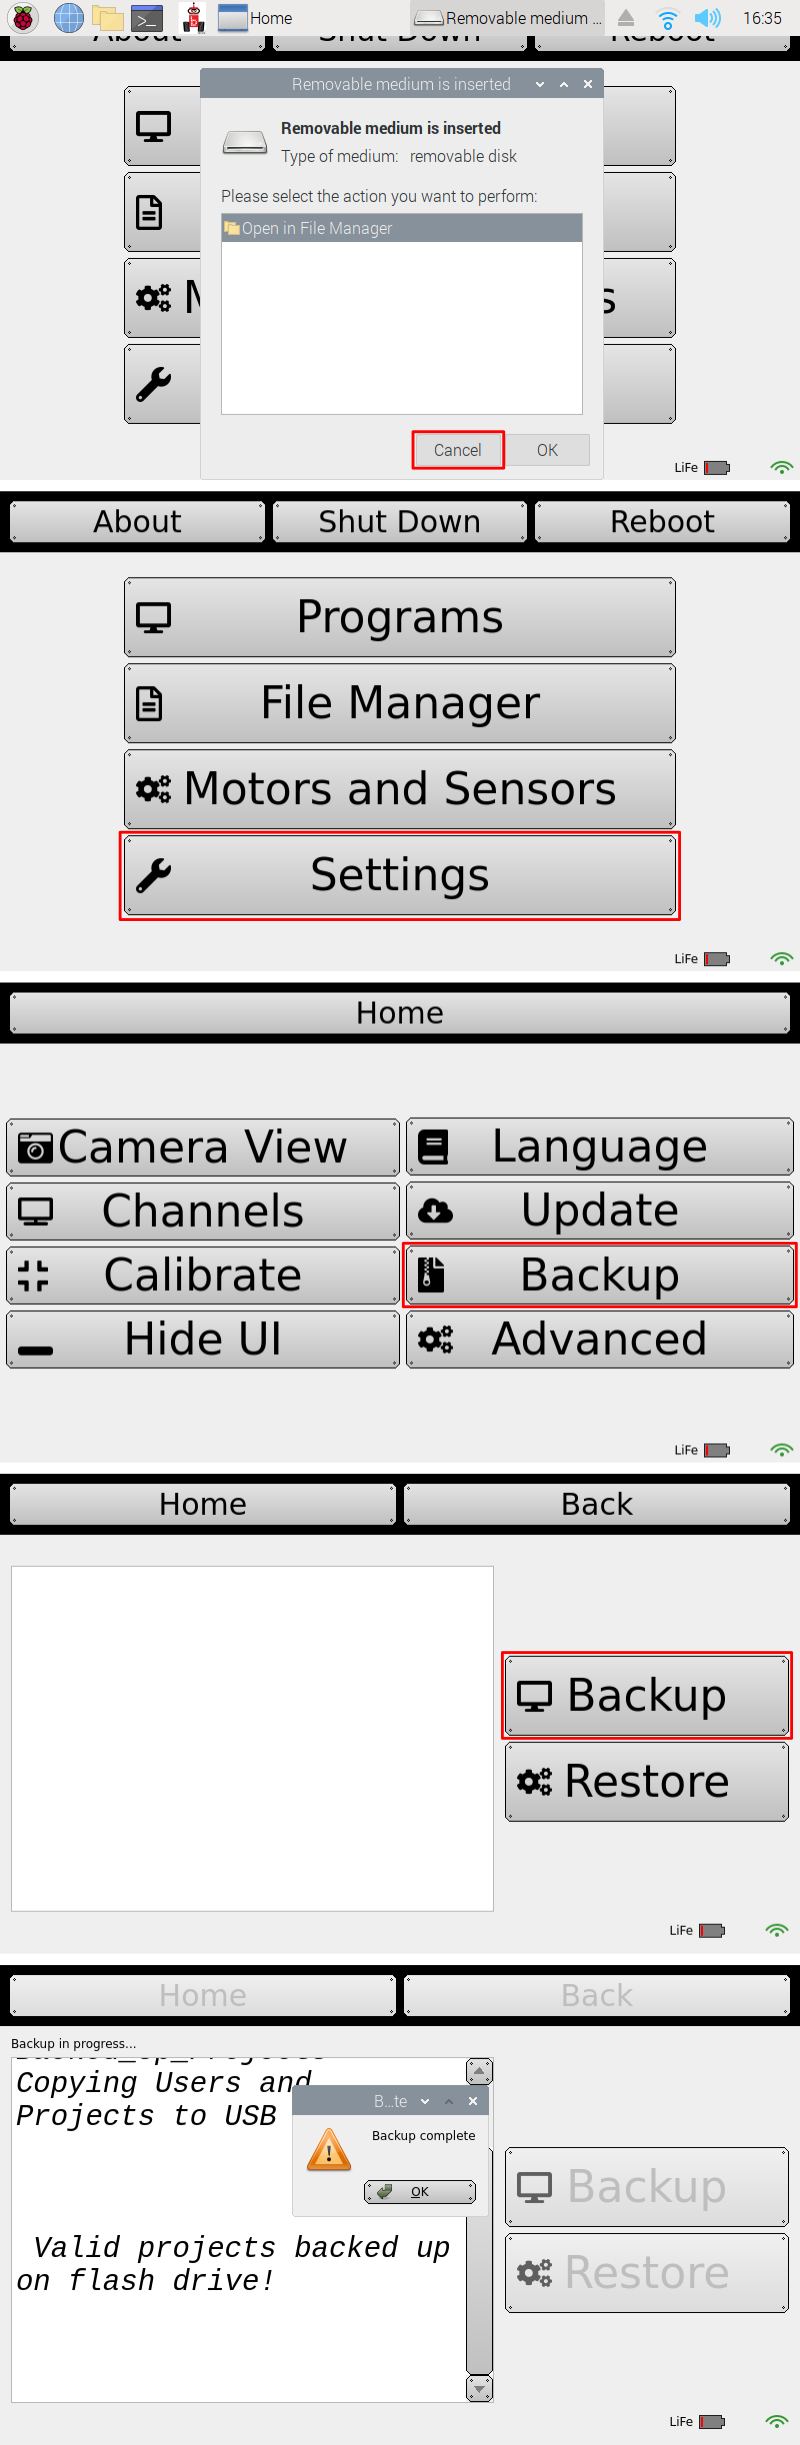
- Power on the controller.
- Plug the USB drive into the controller.
- Select Cancel on the popup.
- Click Settings.
- Click Backup.
- Click Backup.
- After a moment, it should say “Backup complete.”
Restore
You can directly restore the programs created by a backup in the previous step.
❗ Caution
Restoring programs in this manner will overwrite all existing programs.
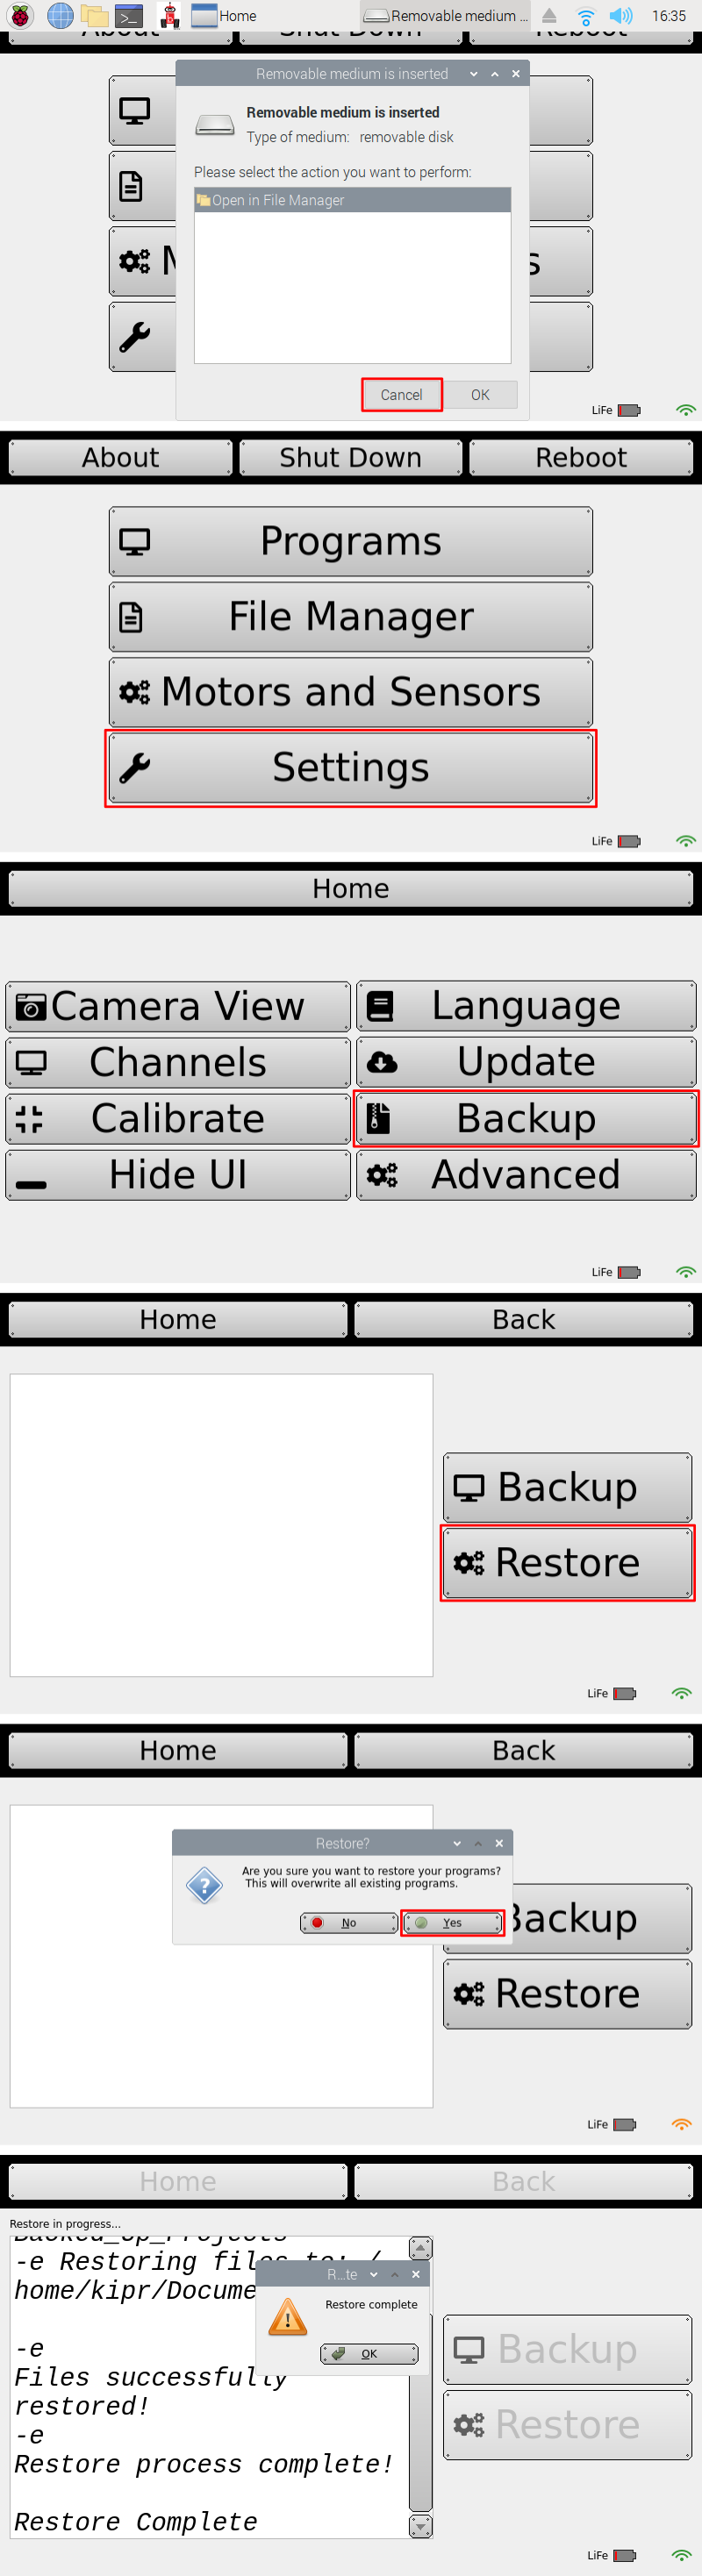
- Power on the controller.
- Plug the USB drive into the controller.
- Select Cancel on the popup.
- Click Settings.
- Click Backup.
- Click Restore.
- If you want to overwrite all existing programs with the backup, click Yes.
- After a moment, it should say “Restore complete.”
Method 2: IDE, User Backup
This method allows you to download a single user and has the benefit that you don’t need an extra USB drive. However, you can only download a single user at a time, so it can be cumbersome if you have many users to back up.
Requirements:
- Bootable controller
Backup
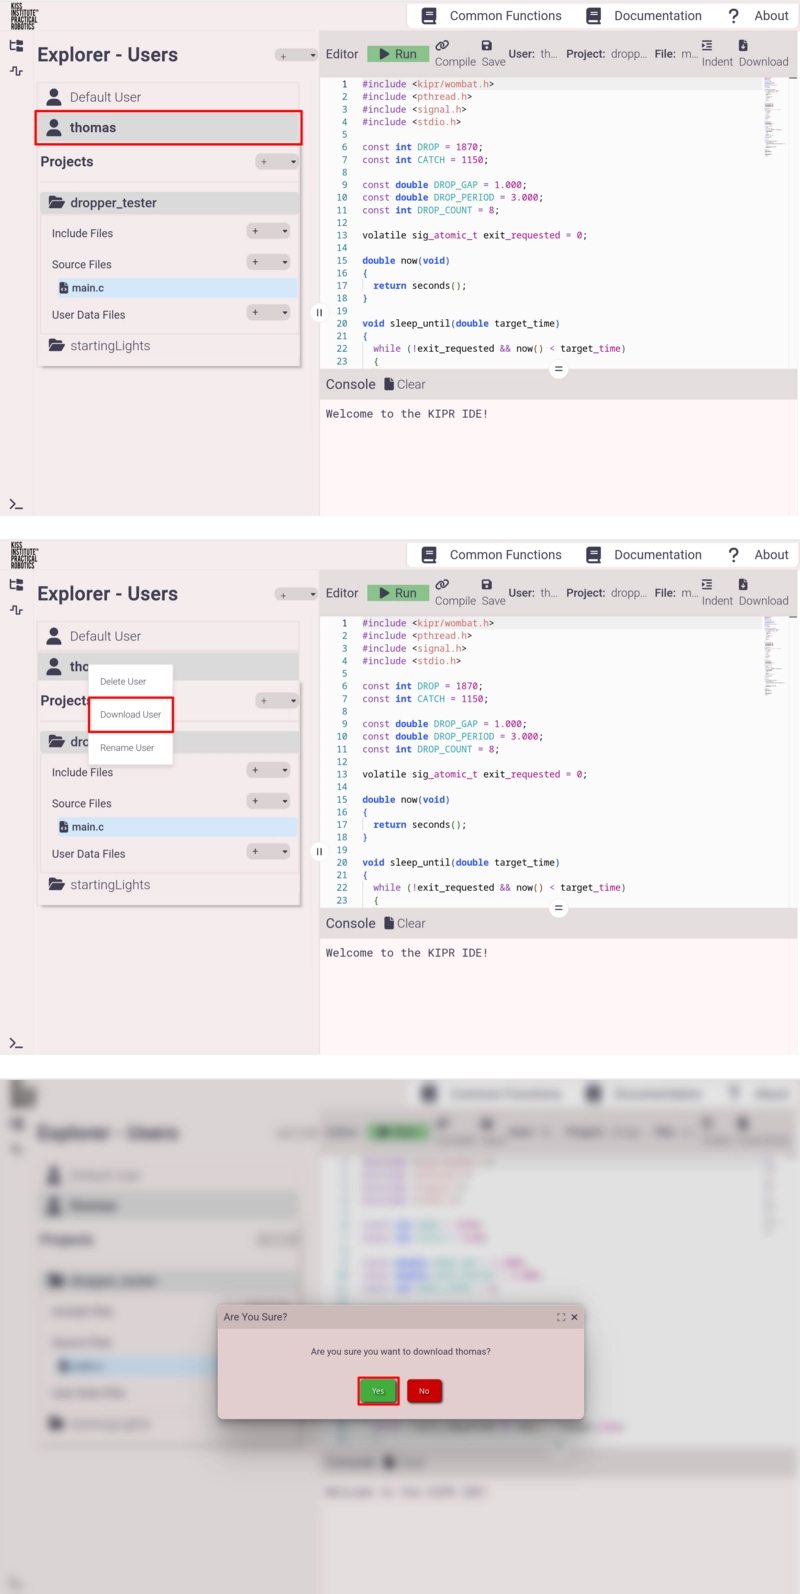
- Right click on the user in the browser.
- Click Download User.
- Click Yes on the popup confirmation.
Restore
- Click the + dropdown.
- Click the Upload User.
- Select the user’s interface mode (in this example, Advanced).
- Click Choose Folder and choose the folder you downloaded during the backup phase.
- Click Upload User.
Method 3: IDE, Project Backup
This is mostly the same as the previous procedure, but you are only backing up one project at a time instead of one user. It can be useful if you want more fine-grained control.
Requirements:
- Bootable controller
Backup
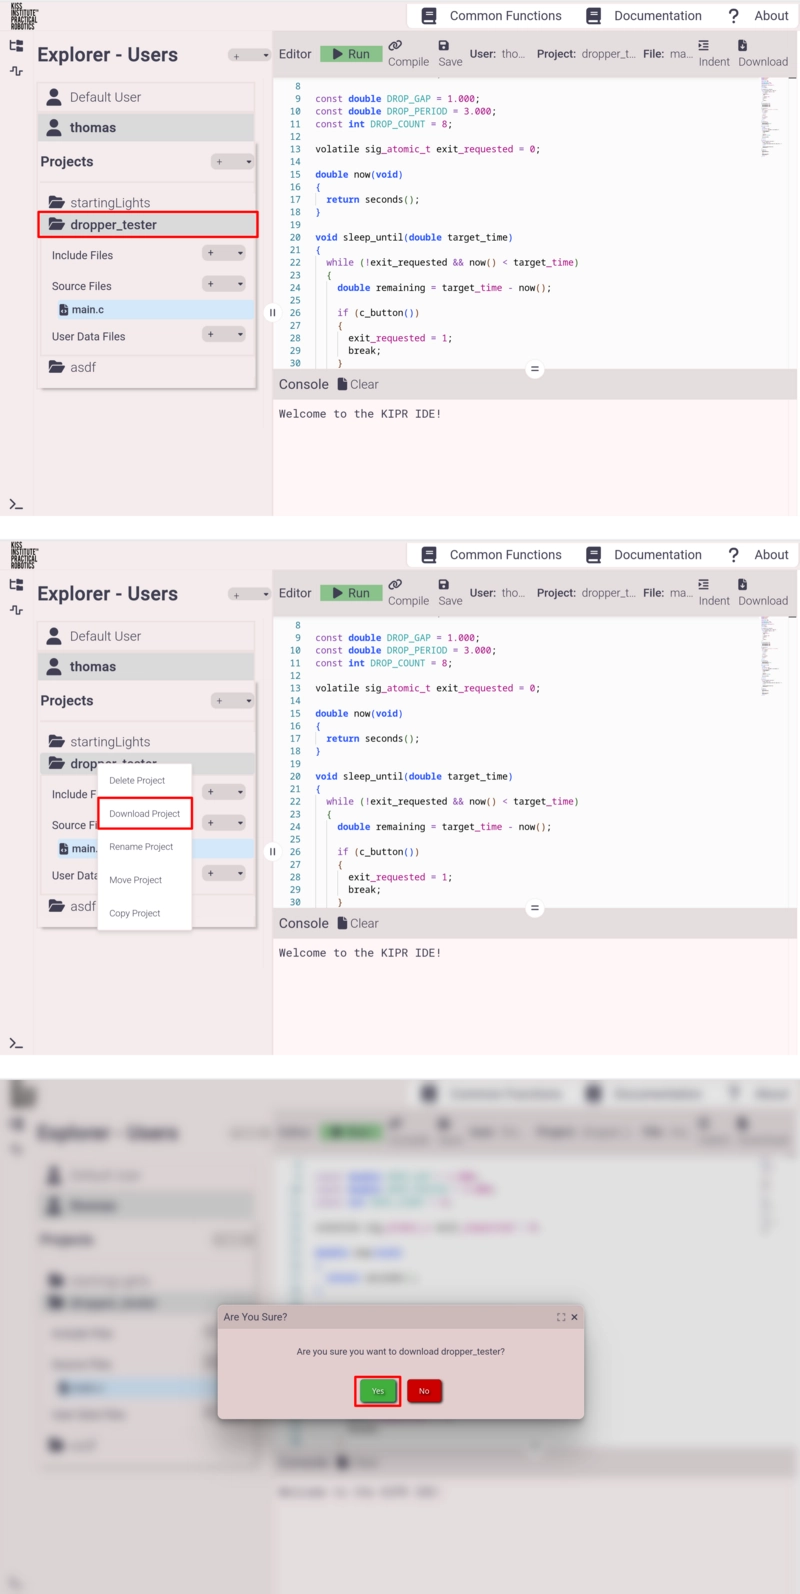
- Right click on the project in the browser.
- Click Download Project.
- Click Yes on the popup confirmation.
Restore
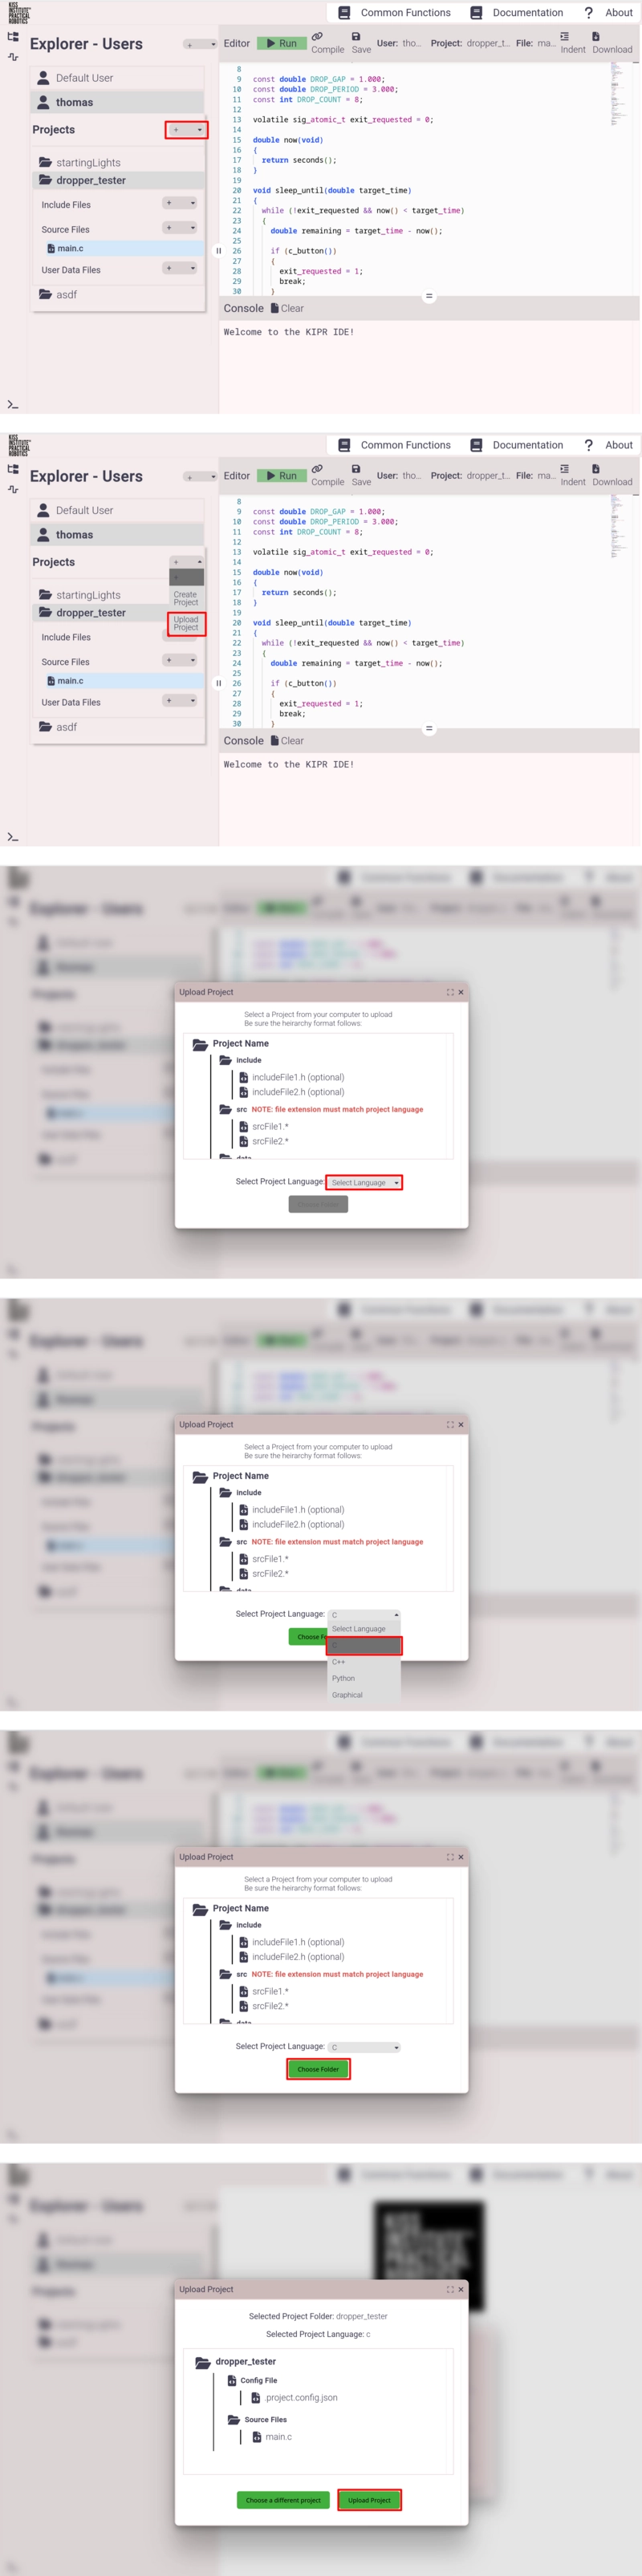
- Click the + dropdown.
- Click Upload Project.
- Click the Select Language dropdown.
- Select your langauge (in this example, C).
- Click Choose Folder and choose the folder you downloaded during the backup phase.
- Click Upload Project.
Method 3: Copy-Paste
You can copy-paste the code into, say, a Google Doc. This is extremely simple, but I strongly recommend against using this method.
Firstly, the system clipboard is not a purely neutral vehicle for data storage. It can mess with whitespace (tabs and spaces), newlines/line endings, character encoding, and can even insert invisible control characters.
Secondly, inserting the code into a program like Google Docs will break the formatting (tabs, spaces, newlines, etc.) can also insert invisible characters that cause strange compilation errors when you try to paste it back into the IDE. You can achieve slightly better results using a simpler program like Notepad on Windows or TextEdit on Mac, but this is still vulnerable to the clipboard issues mentioned above.